Micromechanics and Advanced Materials Laboratory
University of Wisconsin
The Micromechanics and Advanced Materials Laboratory is located in room 212 of the Engineering Research Building (ERB).
Facilities:
Holography lab
Capabilities of the holography laboratory include holographic interferometry for deformation measurement using the static zero order fringe method, the dynamic fringe counting method, and/or the Haidinger fringe method for interpretation; dynamic real time holographic interferometry; production of holographic gratings; and production of white light viewable images.
Deformation analysis via other optical methods such as classical interferometry, fiber optic probes, moire and shadow moire is also done.
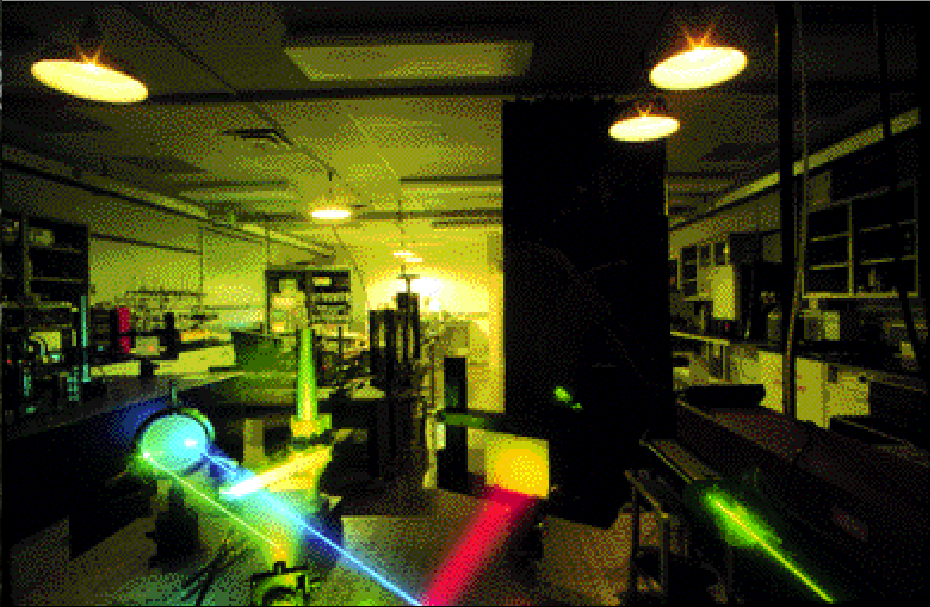
Left: lab image. Right: Dynamic holographic fringes.


Resonant ultrasound spectroscopy
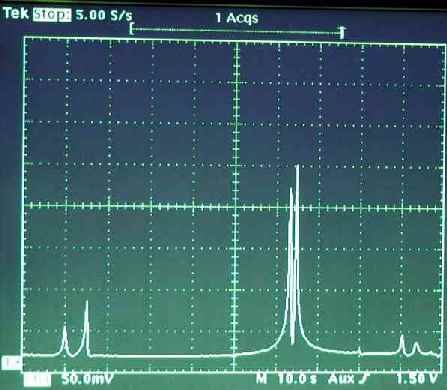
A resonant ultrasound spectroscopy (RUS) apparatus allows study of elastic constants and viscoelastic properties of solids at ultrasonic frequency. Left, image of a cubical specimen between ultrasonic transducers. Right, a frequency scan on the oscilloscope.


Wave transmission ultrasound
Facilities for wave transmission ultrasound are capable of longitudinal or shear waves at several frequencies between 1 MHz and 20 MHz. Modulus elements and attenuation can be determined.
Broadband viscoelastic spectroscopy
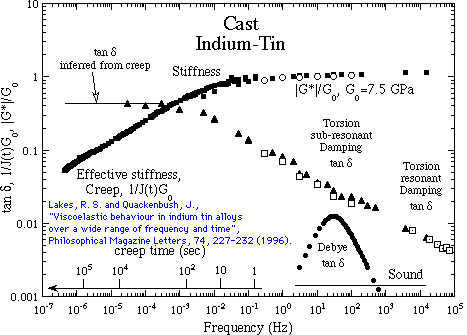
A laser-based micromechanics apparatus allows isothermal study of viscoelastic and microelastic behavior of materials over a twelve decade range of effective frequency from 10-7 Hz up to more than 100 kHz in torsion with no appeal to time-temperature superposition. This apparatus is based on a laser approach to the measurement of specimen deformation and an electromagnetic method to apply torque to the specimen. Phase is measured using a digital oscilloscope or a digital lock in amplifier. This apparatus is also capable of static and dynamic bending experiments and is capable of measurements upon microsamples. The graph below shows viscoelastic properties (shear modulus G* and mechanical damping tan delta) of an indium-tin alloy at room temperature with no appeal to time temperature superposition. The diagram below right shows the broadband viscoelastic spectroscopy apparatus.


Instrument image
Piezoelectric material synthesis and measurements
A fiber optic deformation probe is available for measurement of deformation of piezoelectric materials in response to an electric signal. A charge amplifier is available for measurement of the polarization induced charge due to force upon a piezoelectric material. Piezoelectric measurements can be made over a range of frequencies in the sub-resonant domain as well as at resonance. Piezoelectric phase angles can be measured.
We have synthesized high performance piezoelectric ceramics in our laboratory.
Heterogeneous material fabrication and measurements
Facilities are available for making negative Poisson's ratio polymer and metal foams as well as metamaterial lattices and for characterizing them via optical methods and resonant ultrasound spectroscopy. Lattices, foams and composites are studied via broadband viscoelastic spectroscopy as well.
Specimen preparation tools
Furnaces, programmable digital control
Strain gage tools
Hydraulic press
Two diamond saw stations
Compression devices for making negative Poisson's ratio foam
Optical microscopes
Creep measurements
A creep frame is available for creep testing at ambient or at elevated temperature. Creep can also be done via servo-hydraulic frames or via the broadband viscoelastic spectroscopy apparatus.
Strain gages
Strain gages are used when appropriate, in the context of creep studies of stiff materials or in other tasks involving deformation analysis.
Shared facilities
Materials Science Center (MSC) at UW-Madison
The MSC is a major user facility housing four transmission electron microscopes, two workhorse scanning electron microscopes (SEM), a high resolution field emission SEM with full orientation imaging based on backscattered electron Kikuchi patterns (LEO 1530), an advanced scanning Auger microprobe, a X-Ray photoelectron spectroscopy system, a high resolution reflection/transmission X-Ray diffractometer, specimen preparation facilities, and image processing and analysis facilities. The center is supported by three full-time staff members who provide training, service, and support. A new, state-of-the art ambient AFM (Digital Instruments Multimode AFM, Nanoscope IV) is available, and functions in tandem with a nanoindentor (Hysitron TriboScope with Dynamic Stiffness Mapping capability).
Several 3D printing facilities are available at the university as well as off campus; we have been using them to fabricate lattices and materials with designed structure. We have not called them metamaterials.
Shared facilities available for mechanical testing research include the Structures Laboratory of the University of Wisconsin College of Engineering. Facilities include three 10,000 pound screw-driven computer controlled test frames, two 20,000 pound servo-hydraulic frames, one 100,000 pound frame, and one million pound capacity frame. Vibration resources including shakers and laser vibration sensors are also available.
Facilities associated with collaborative laboratories include nano-indenters and micro-testers for tension of samples of soft tissue.
|
|
|